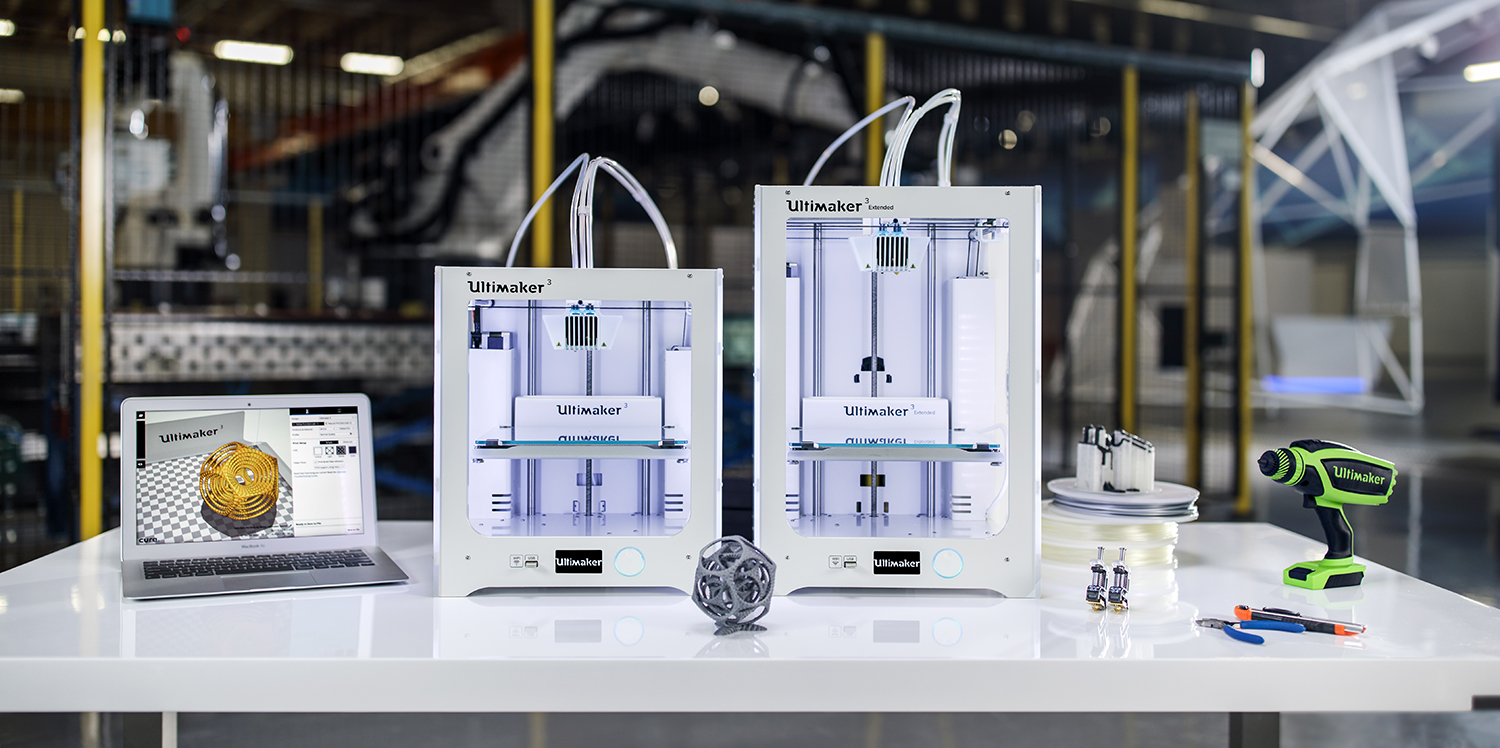
Finally, I have the Ultimaker 3 extended in my possesion. I already have experience with the Ultimaker Original plus but got tired of the quirks: feeder problems, bad connectivity, loudness and no automatic bed levelling so I decided to buy a new printer. So I went for the Ultimaker 3 extended because of the dual extruder design and reliability. I considered the BCN3D Sigma because it also has two extruders but decided not to; the BCN3D Sigma is loud and has bed wobbeling issues. Here is my verdict about the ultimaker 3 extended:
Design
The printer has a white plastic frame but it doesn’t feel cheap at all with built-in LED lights. The dimensions of the printer are: 342 x 505 x 688 mm and the build volume of the printer is: 197 x 215 x 300 mm if you want to dual extrude and 215 x 215 x 300 mm if you want to use one extruder. The biggest redesign of the printer are the dual extruders, Wi-Fi support and automatic bed levelling.
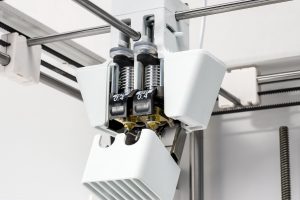
The print head now utilises two print cores instead of a heating block with two nozzles. It is no longer possible to hot swap the nozzles if you want to change the width of the nozzle, you will need to buy a whole new print core! Which are 99,95 euro, they are expensive. I don’t mind the change because it makes printing with PVA possible with the special BB printing core that is proprietary for PVA. There is also an AA printing core that is compatible with all the standard materials: PLA, ABS, PETG, NYLON, PC and TPU.
The printing bed is the same as any Ultimaker: a glass sheet with a heating element. So far, the glass sheet sticks to prints well but if you want a stickier surface; ultimaker includes a gluestick in their packaging. I personally use 3DLAC for difficult prints.
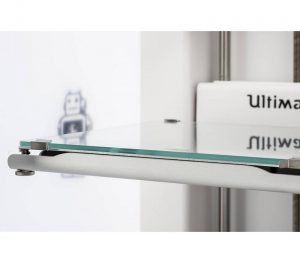
The automatic bed levelling is a blessing; it makes the printer ten times more reliable. You can set the printer to automatically level the bed before every print, that makes it extremely reliable. I have not had any failed prints because of this because I always have a perfect first layer.
The printer finally has WIFI support. Loading up files via a SD card or USB is not necessary anymore; if you use the Cura slicer, prints can be upload from your computer to your printer. Ultimaker still includes a USB port in the printer. The printer also includes a camera that utilises the ultimaker 3 app or cura slicer over WIFI to see the printer print in real time.
Print quality
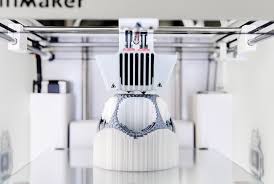
My prints come out amazing but print times are long especially when you want to dual extrude. Print resolution is from 0.06 mm to 0.2 mm. The prints have smooth and clean surfaces. Printing with PVA supports will take more time than printing with normal plastic supports.
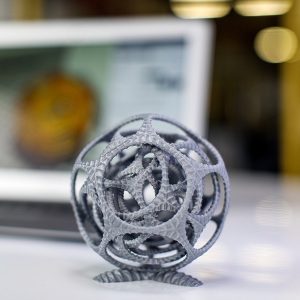
Printing with PVA support is worth it because PVA is water soluble; this opens the possibility to print more complex structures. Ultimaker has a video where they demonstrate the potential of PVA supports, they printed freely spinning spheres inside each other that is printed in one take and only needs water to remove the PVA supports. I used the PVA supports to get a better finish of parts where standard support debris is not welcome. Cura even has a special option in the setting to print with PVA support; creating separated stl files is only necessary when you want to print with two different colours.
Conclusion
The Ultimaker 3 is a reliable printer with amazing additional features. They only drawbacks I can find are the price and high print times. I recommend this printer to people who are serious in 3D printing. companies and schools can benefit from this printer as well because the printer is amazingly reliable. I don’t recommend this printer to people who are new to 3D printing or just occasionally print because it is a huge investment.
This review was very useful to me, thanks you very much Samantha!