This is the fifth post of 3D printing for teens! In this weekly series I will share my experience and tips and tricks. The goal for this series is to get more teenagers excited about 3D printing and to help them master the craft.
In advance
We as Teens don’t have a lot of money to spend. Most 3D printer in the market are above the 1000 euros, the best way to experience 3D printing is building one yourself! Not only will your printer be cheaper you will also gain a lot of experience from it. At first it may seem daunting, but I hope this series will inspire you to start building one yourself. In this post I will go in-depth into the FDM printers. These are cheap to build and easy to understand!
What is FDM?
In my previous post I explained FDM (fused depositioning modeling) printing. Universally it’s reheating plastic and modelling it into your wanted shape. The technique is basic but mechanically it is a bit harder. Luckily I will explain te basic parts you need. In my next post I will go in-depth into the components.
What parts do I need?
A FDM 3D printer needs a frame with a X-Y-Z axis. For the plastic you need an extruder with the feeder. To control the components, you need to have a controller. I will go in depth into the electronics later in this series!
Frame
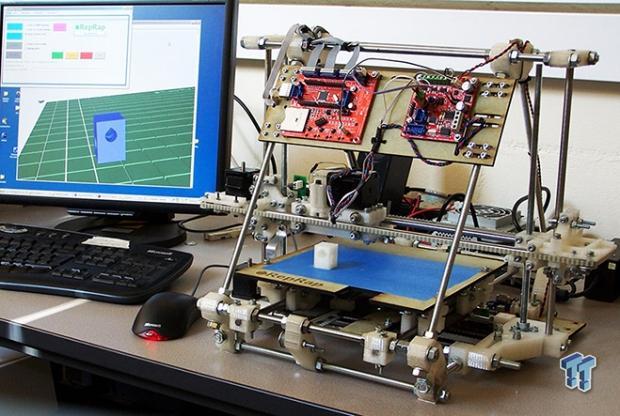
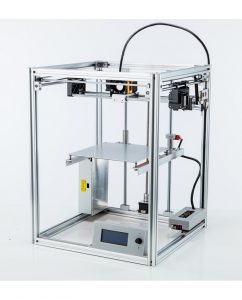
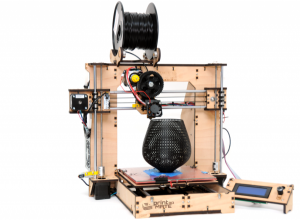
To house all your components you need a frame, used to be made of wood but people use aluminium rails nowadays. For a beginner wood is the best option, it’s easy to work with. My first printer was made of wood for that reason. If you have a little more experience with working with metal go for it your printer will have a stronger frame but wood is strong enough.
X-Y-Z axis
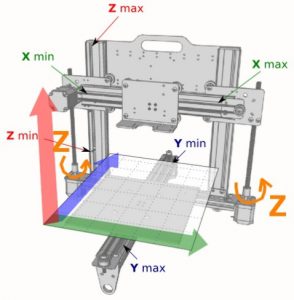
A FDM printer head needs to move freely to make the shapes you want, therefor needs to be able to move in all three directions. My printer has a x,y moving printer head and a printer bed moving in the z direction. I also see printer with a x,z moving printer head an y moving printer bed. It’s your printer so choose how you want to configure you printer you can configure you axis any way you want.
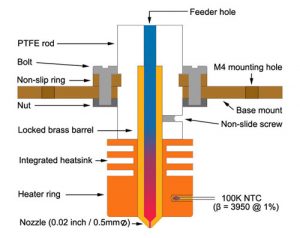
Hot-end
The printer head, through the hot-end a 1.75 mm or 2.85 in diameter filament will melt. The hot end will extrude 0.1-1 mm in diameter plastic string. The smaller the diameter the more precise your printer. I recommend to not go smaller than 0.2 mm because the higher the resolution the higher the change to have a clogged nozzle.
Feeder
The feeder will push plastic through the hot-end. There are two types of feeder: Bowden style or direct style. Bowden style will indirectly feed the material trough the hot-end, there is some distance between the feeder and the extruder. Direct style will sit directly on the extruder, it feeds directly into the extruder. Both have their difficulties. I will explain them in a later post when we talk about feeders.

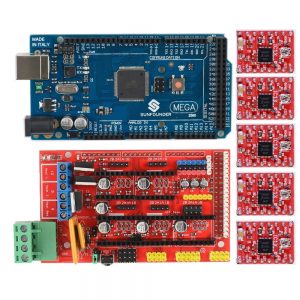
Controller
Your controller will control your electronics, that means the thermistors (heating element), stepper motors (what make the printer move), the interface and sensors. The cheapest controller is an Arduino mega you can go as luxe as using an ARM CPU. Mind you the better processing power you controller has the better you printer can make complex calculations and will result to better outcome of prints.
To sum up
There are many ways to build you own FDM printer. The possibilities are endless! Most importantly building you own printer is very educative and fun!
Next post
An in-depth look in the X-Y-Z axis.
Get 3D printed headphones: click here
Visit the shop: click here
Thank you for this quick review, I learn a lot!